Note: There's an updated version of this tutorial for Dirac Live 2 and higher.
Setting input and output levels in Dirac Live Calibration Tool (DLCT)
This tutorial shows how to set input and output levels in Dirac Live Calibration Tool (DLCT) correctly for best calibration results.
Requirements
AVR with Dirac Live room correction (e.g. NAD T758v3) or standalone Dirac Live room correction device (e.g. miniDSP DDRC-88A/BM).
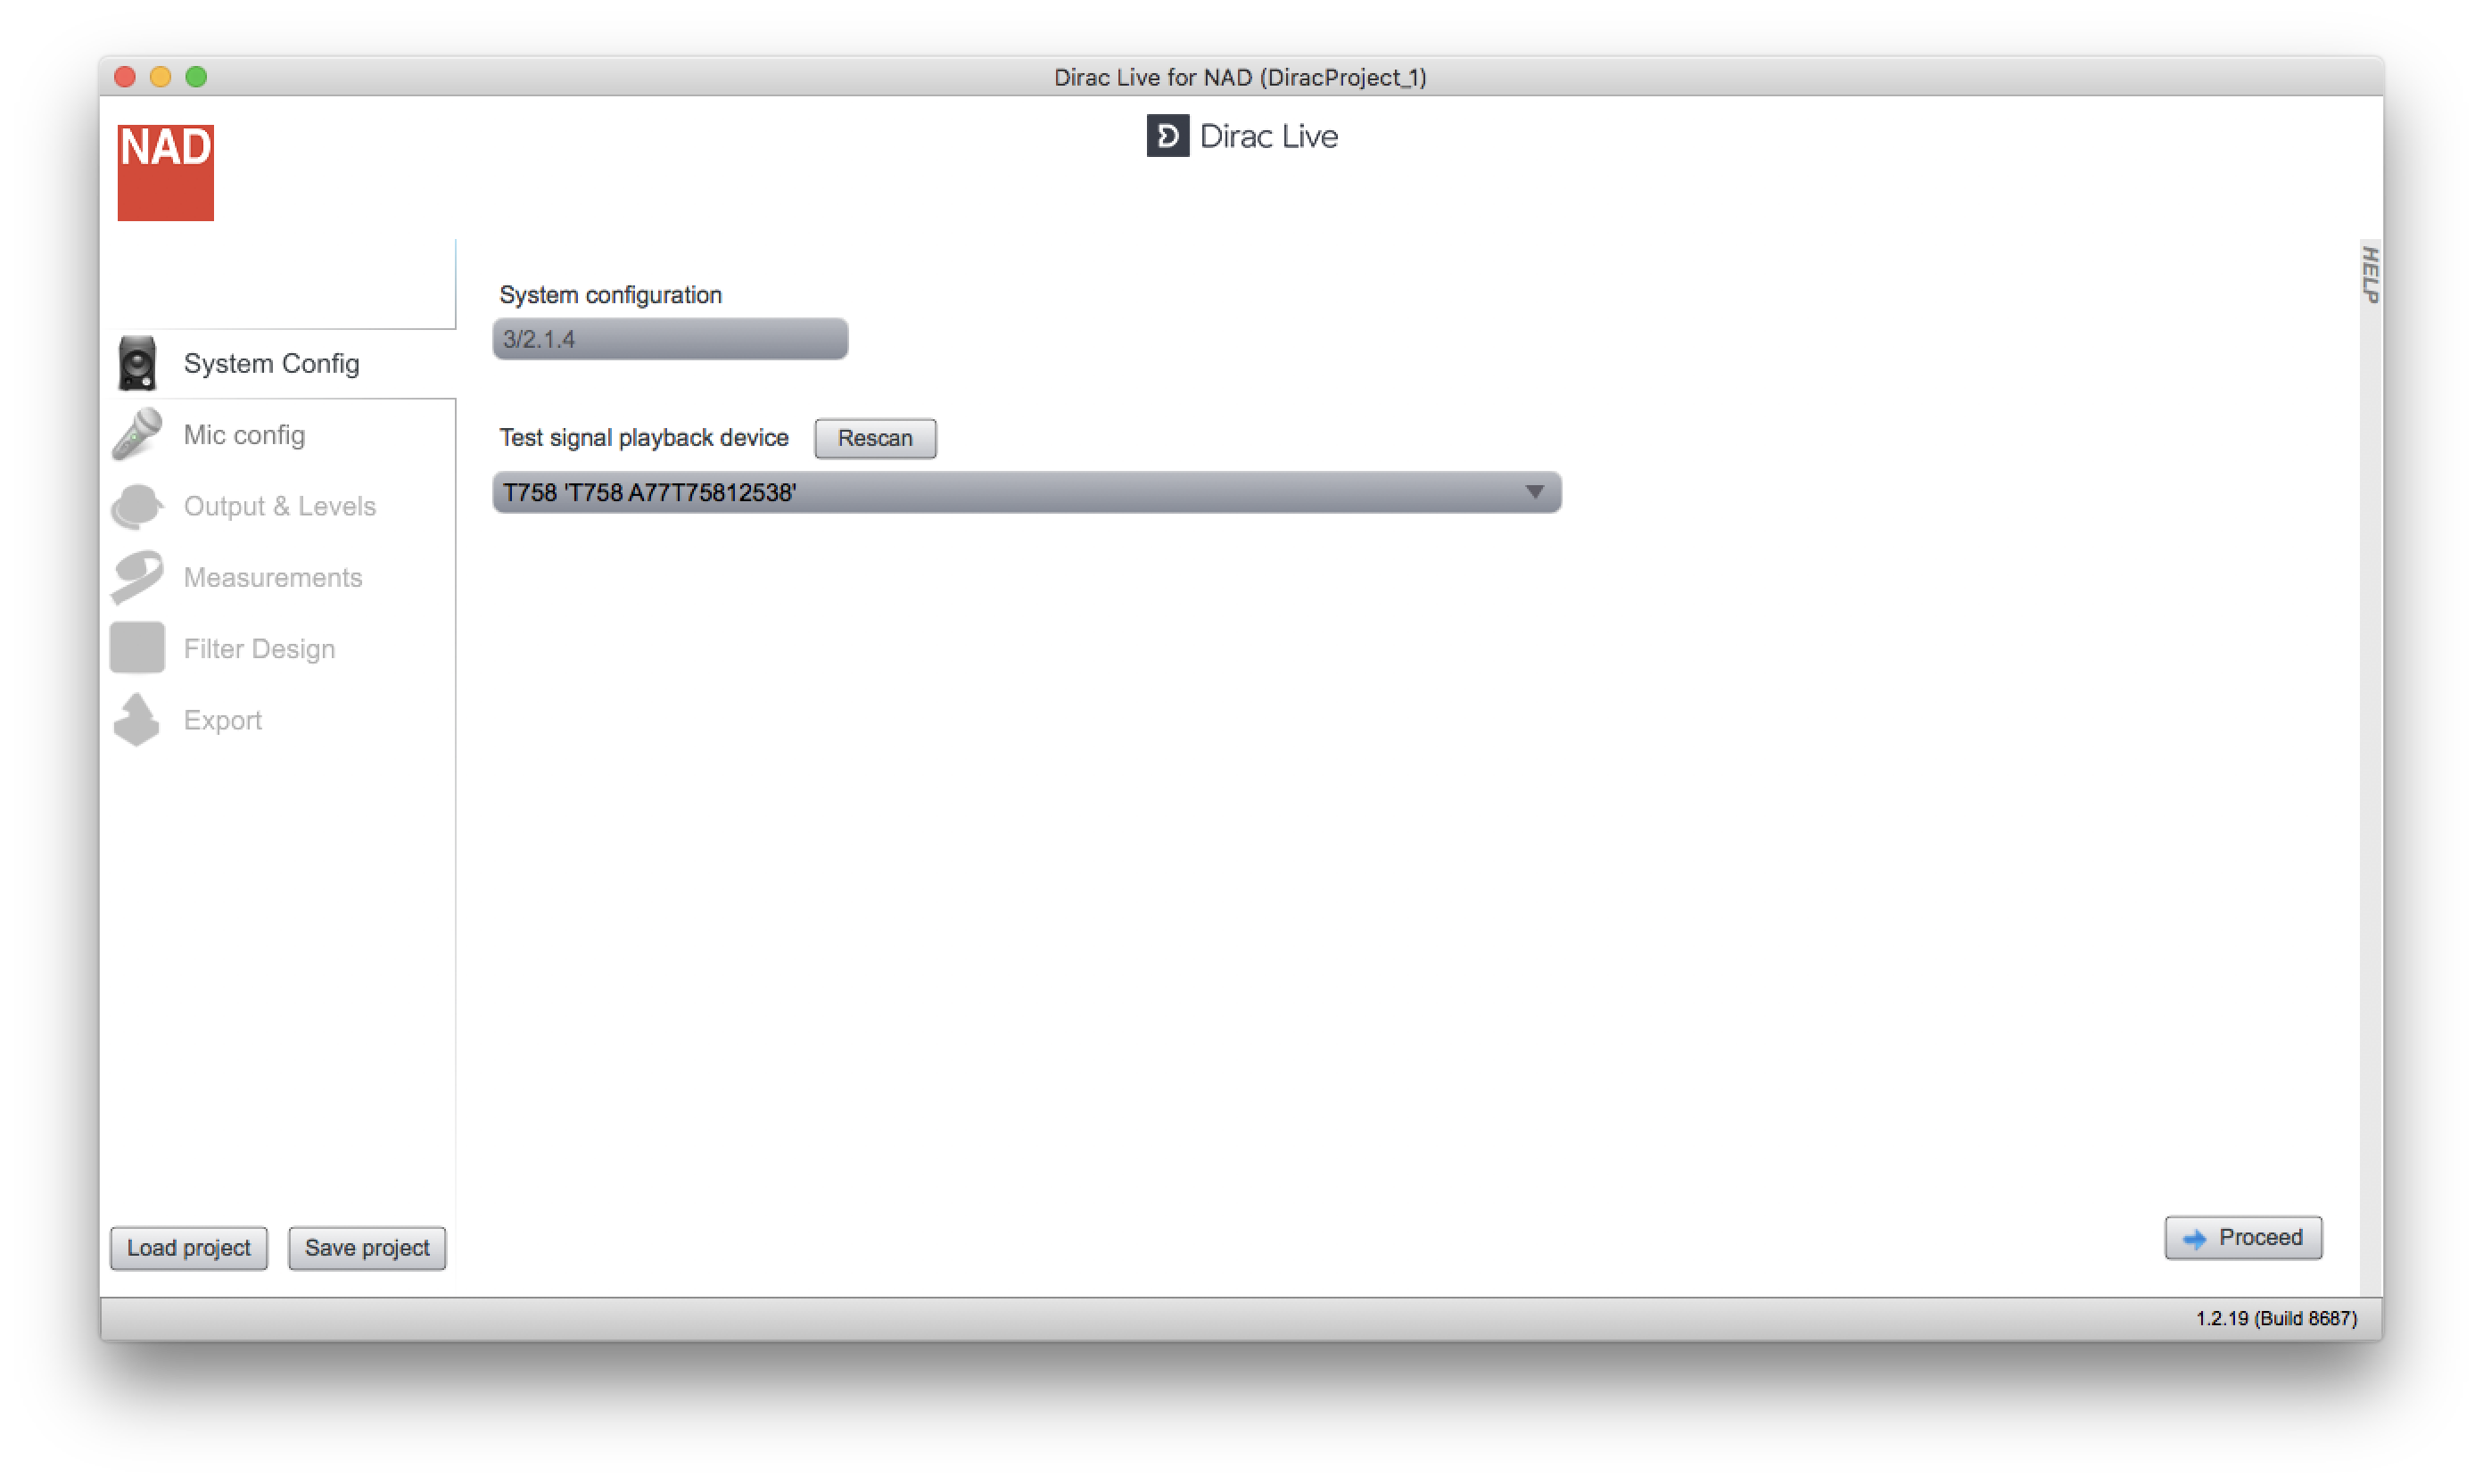
DLCT system configuration
Make sure your AVR/pre-pro knows about all connected speakers and is configured correctly before running DLCT.
Select appropriate "System configuration" and "Test signal playback device" (your AVR/pre-pro) in DLCT.
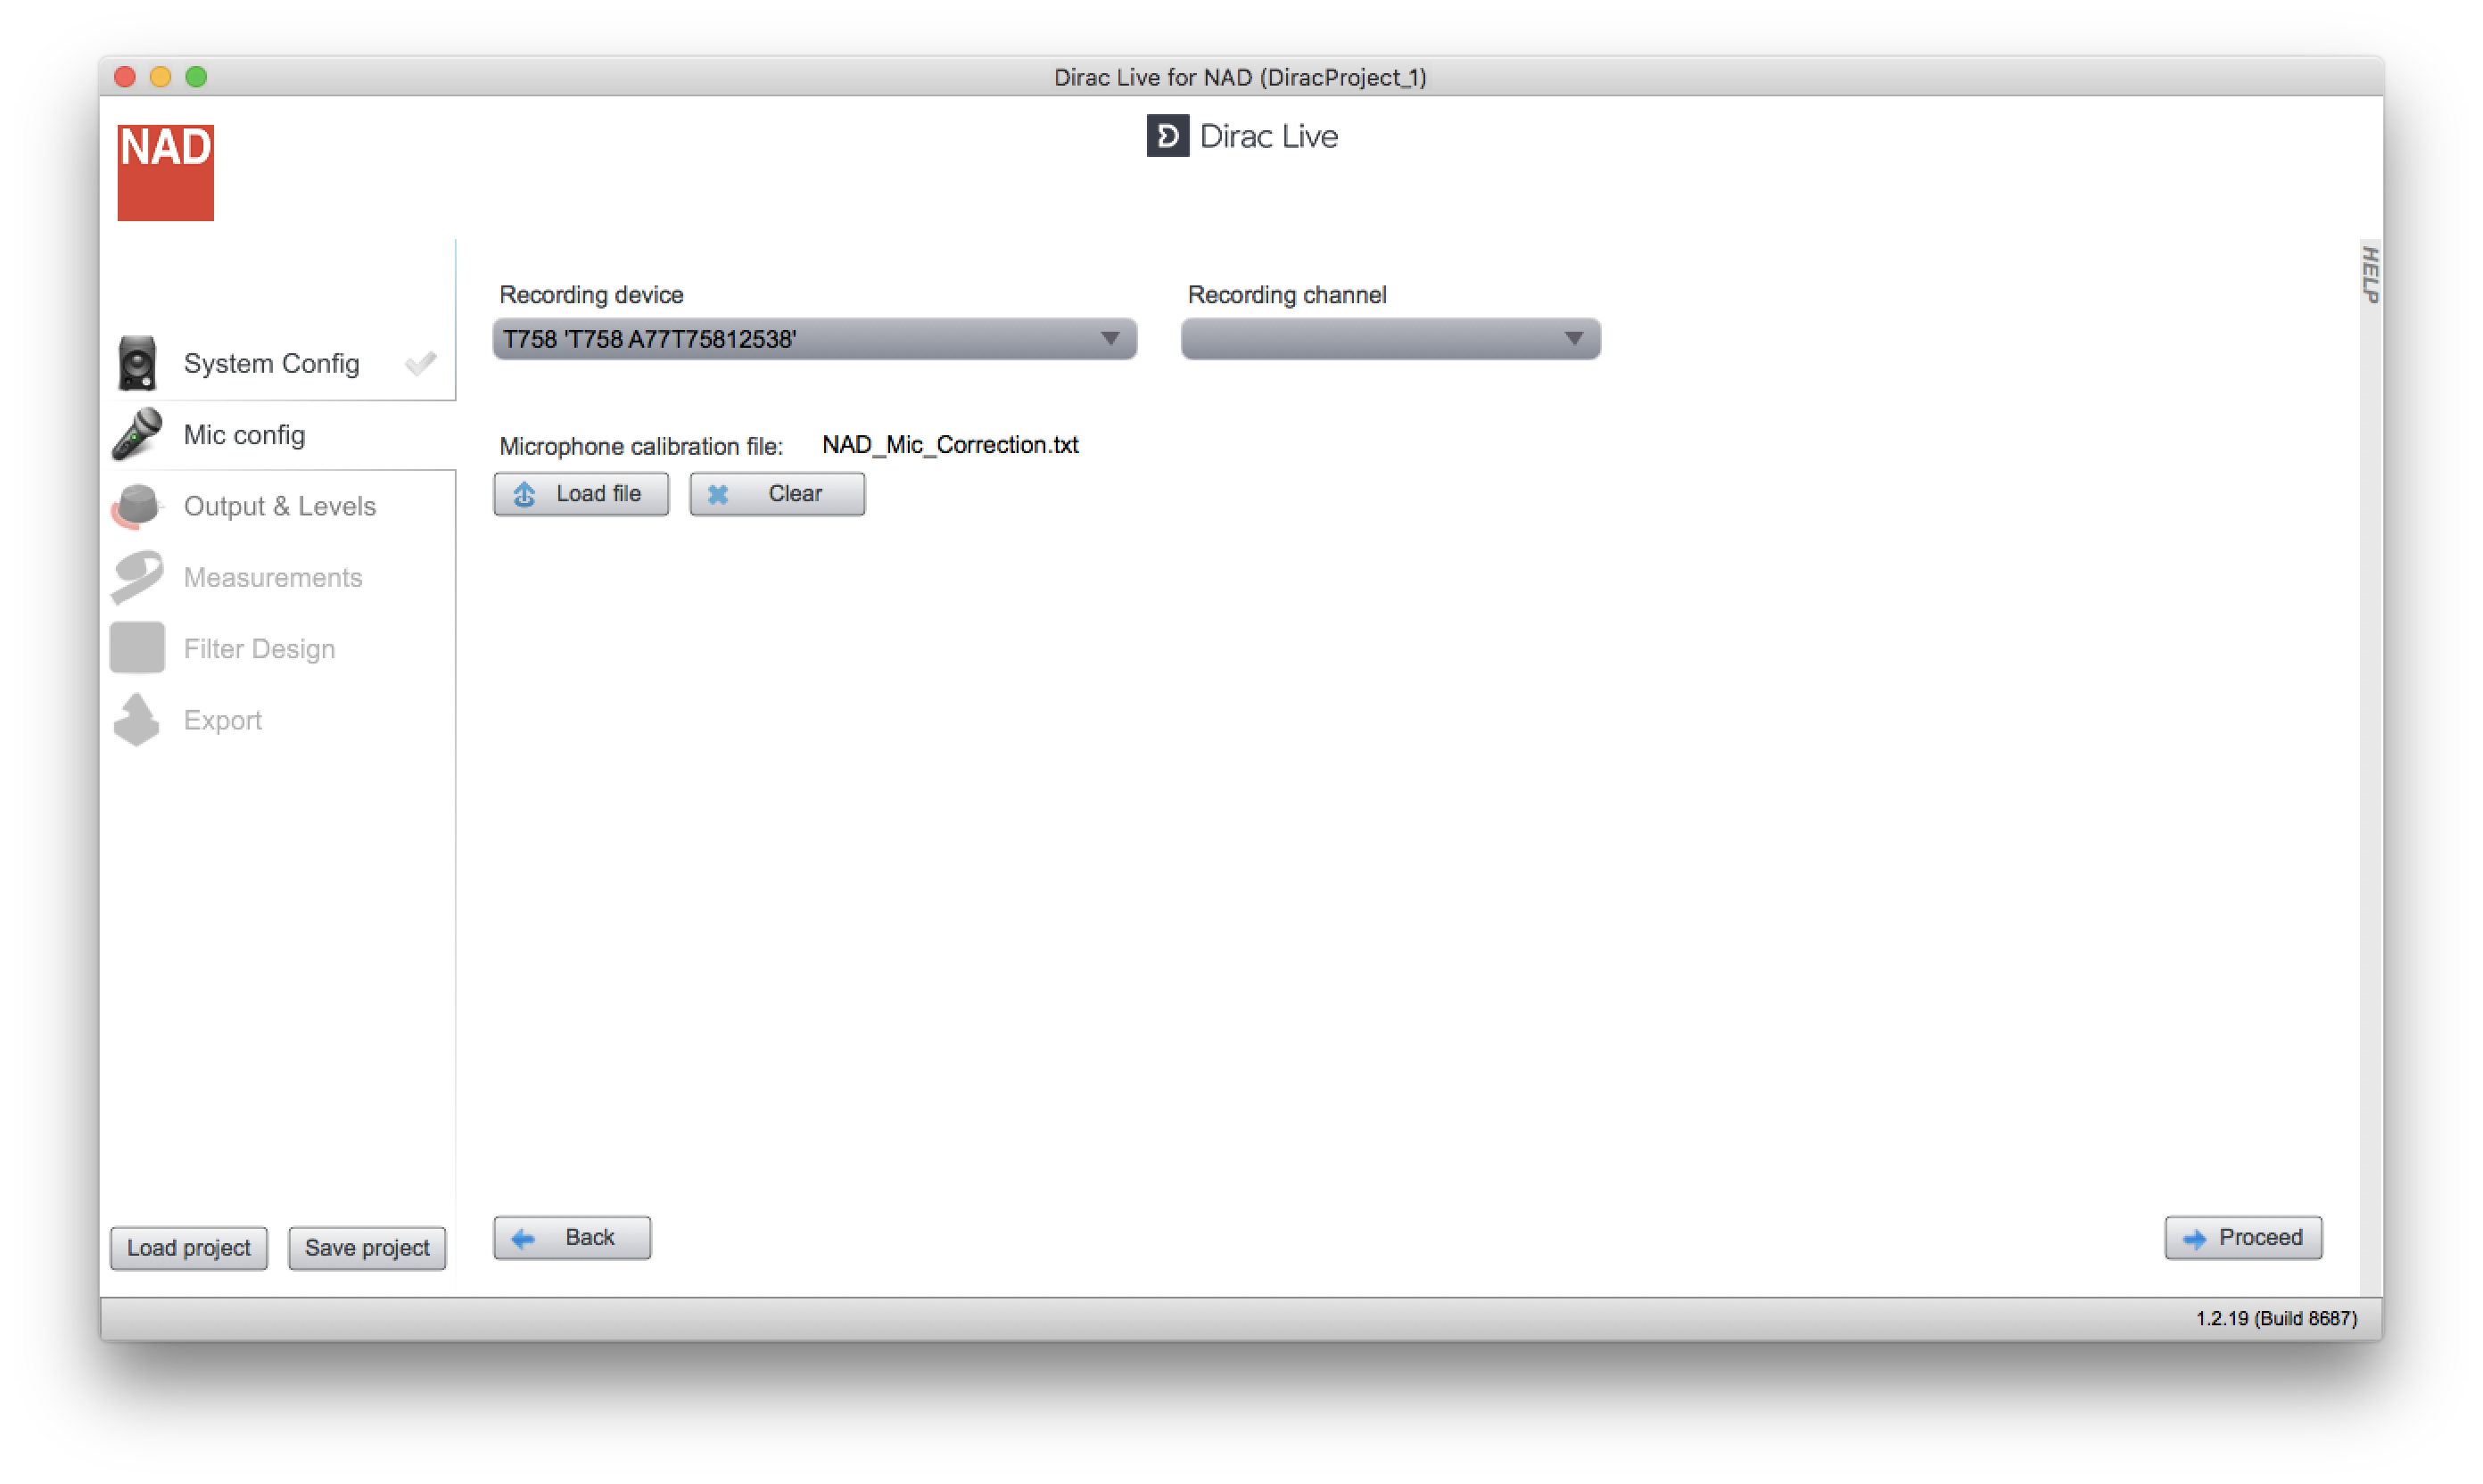
DLCT mic configuration
Connect mic to AVR/pre-pro or PC (some devices offer both options). Select the mic under "Recording device". If the mic isn't selectable although connected then restart DLCT. If the mic came with a calibration file, load it by clicking on the "Load file" button.
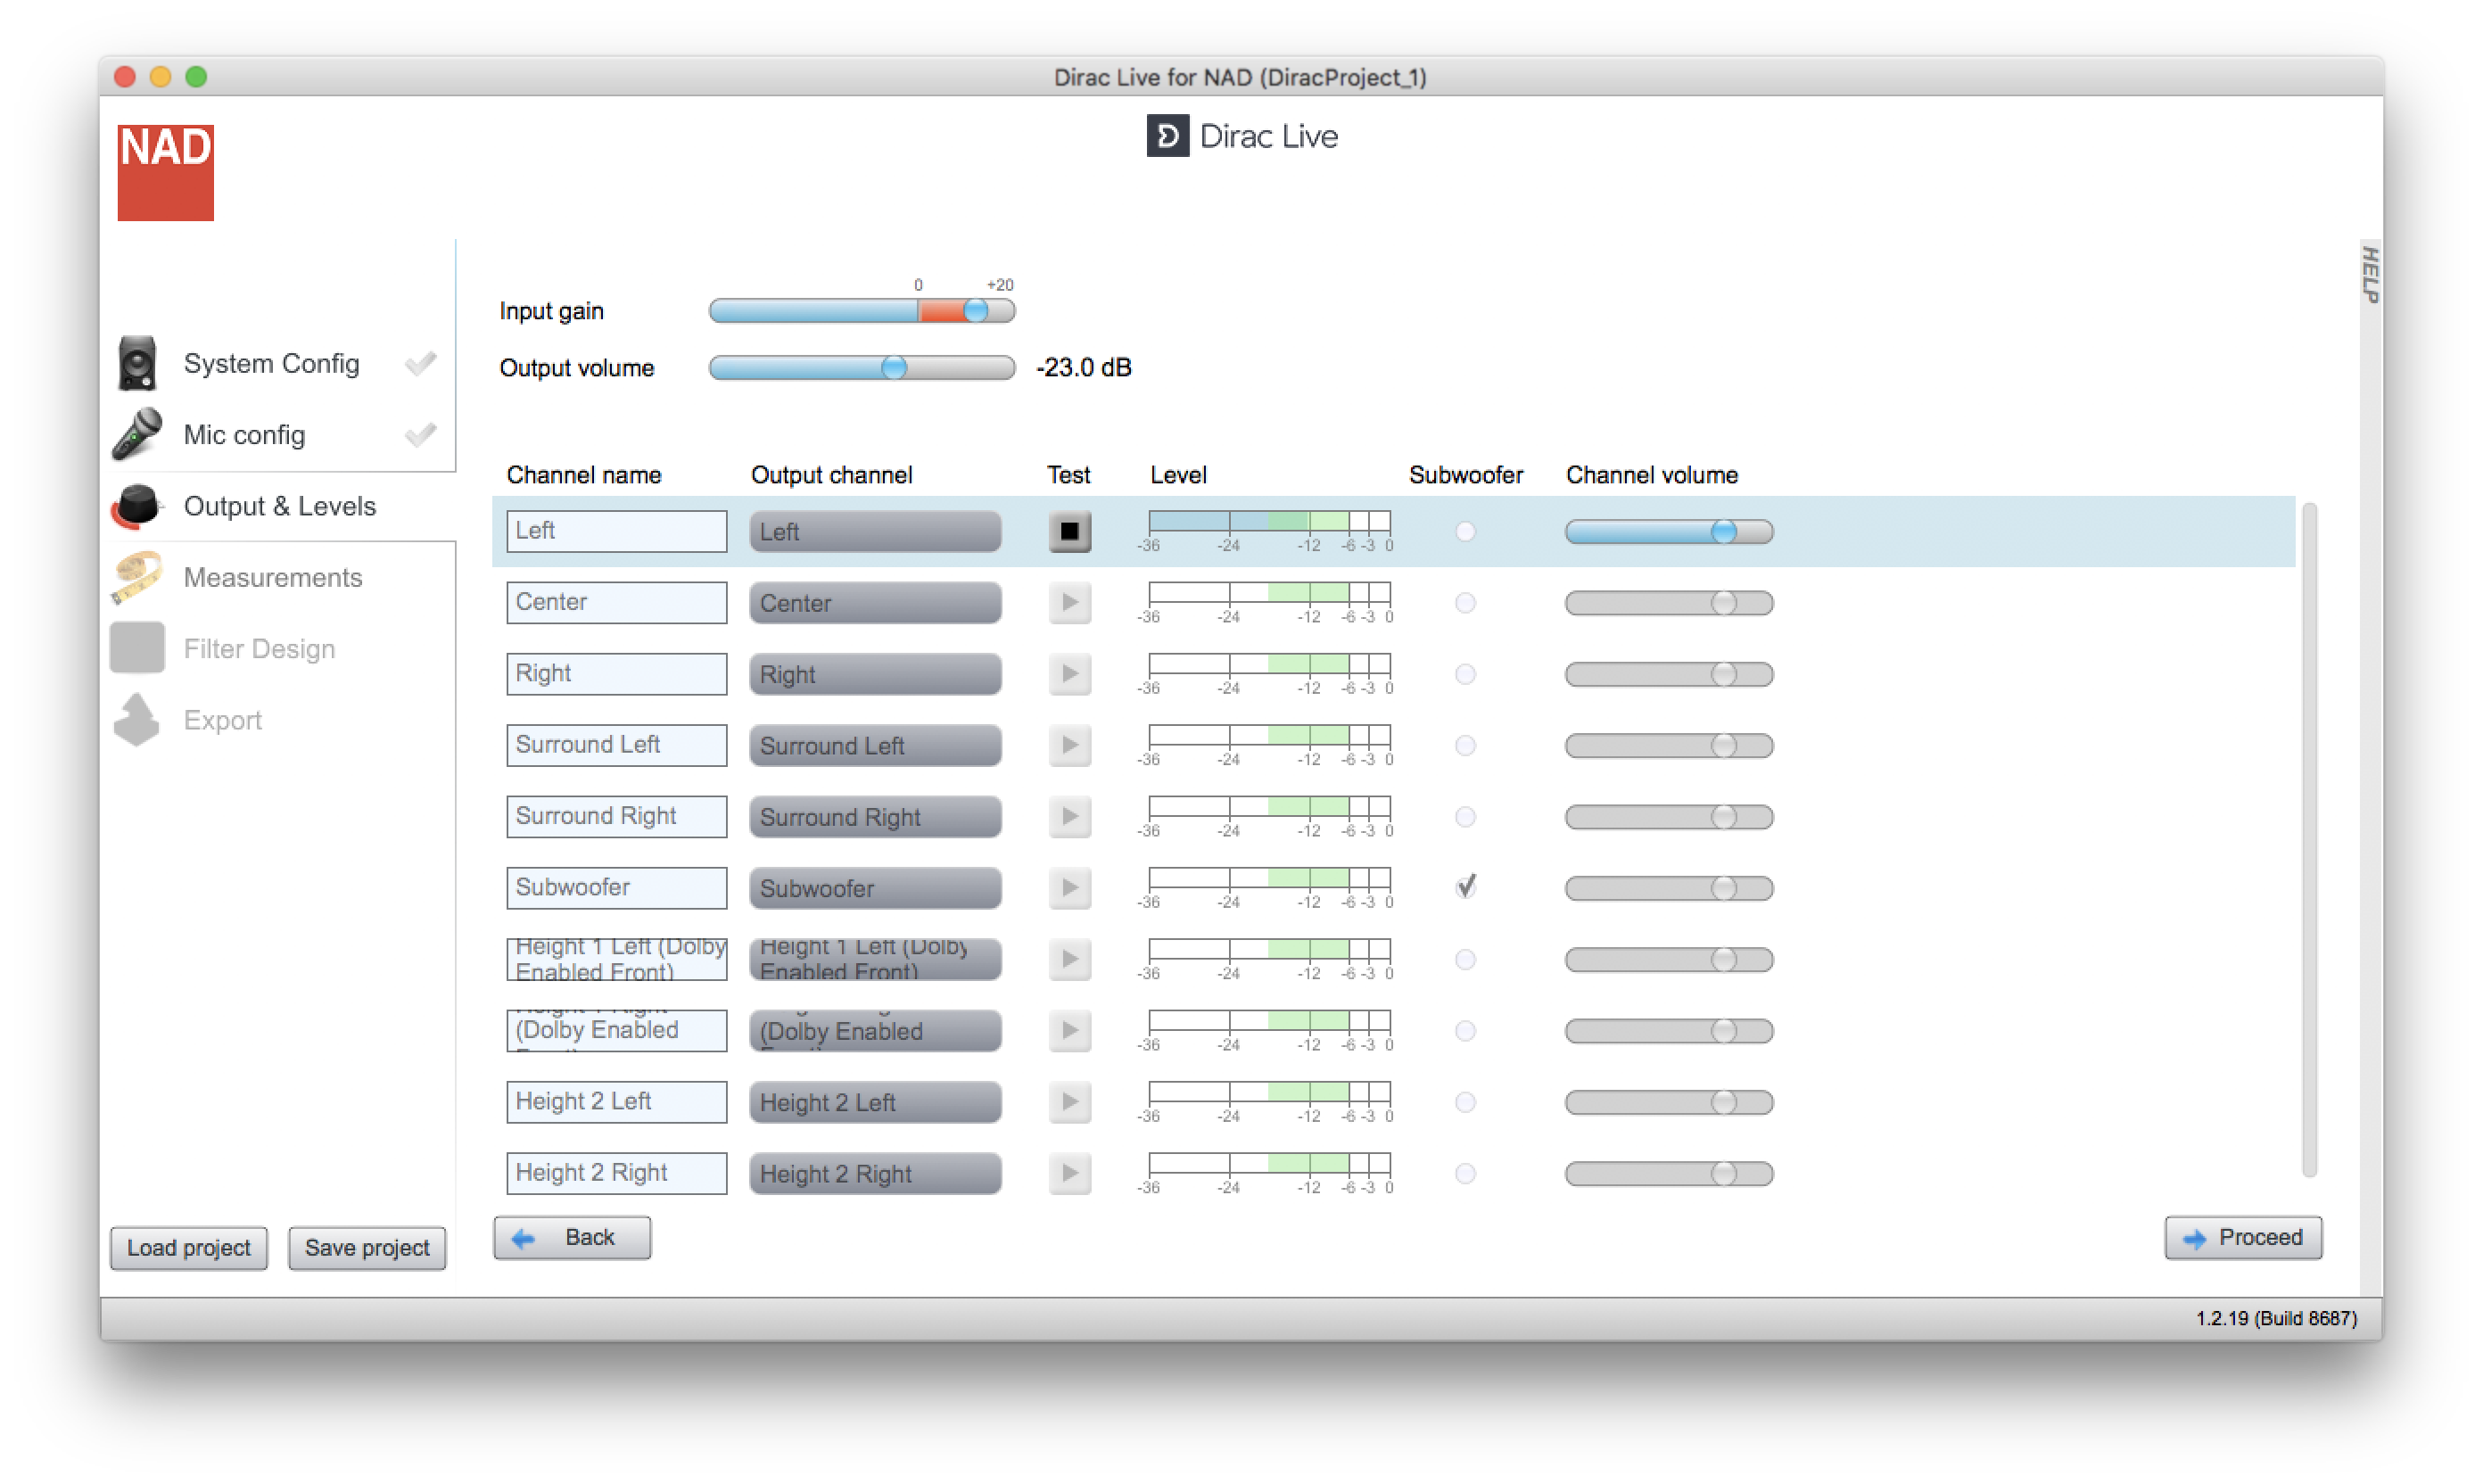
DLCT output levels
Move sliders for "Input gain" and "Output volume" to their lowest value, all the way to the left.

With no sound playing slowly increase "Input gain" so any background noise (blue bar in channel level meters) is below -24dB (better: -36dB). If no blue bar becomes visible until you've reached the max. slider position then leave the slider at the very right position.
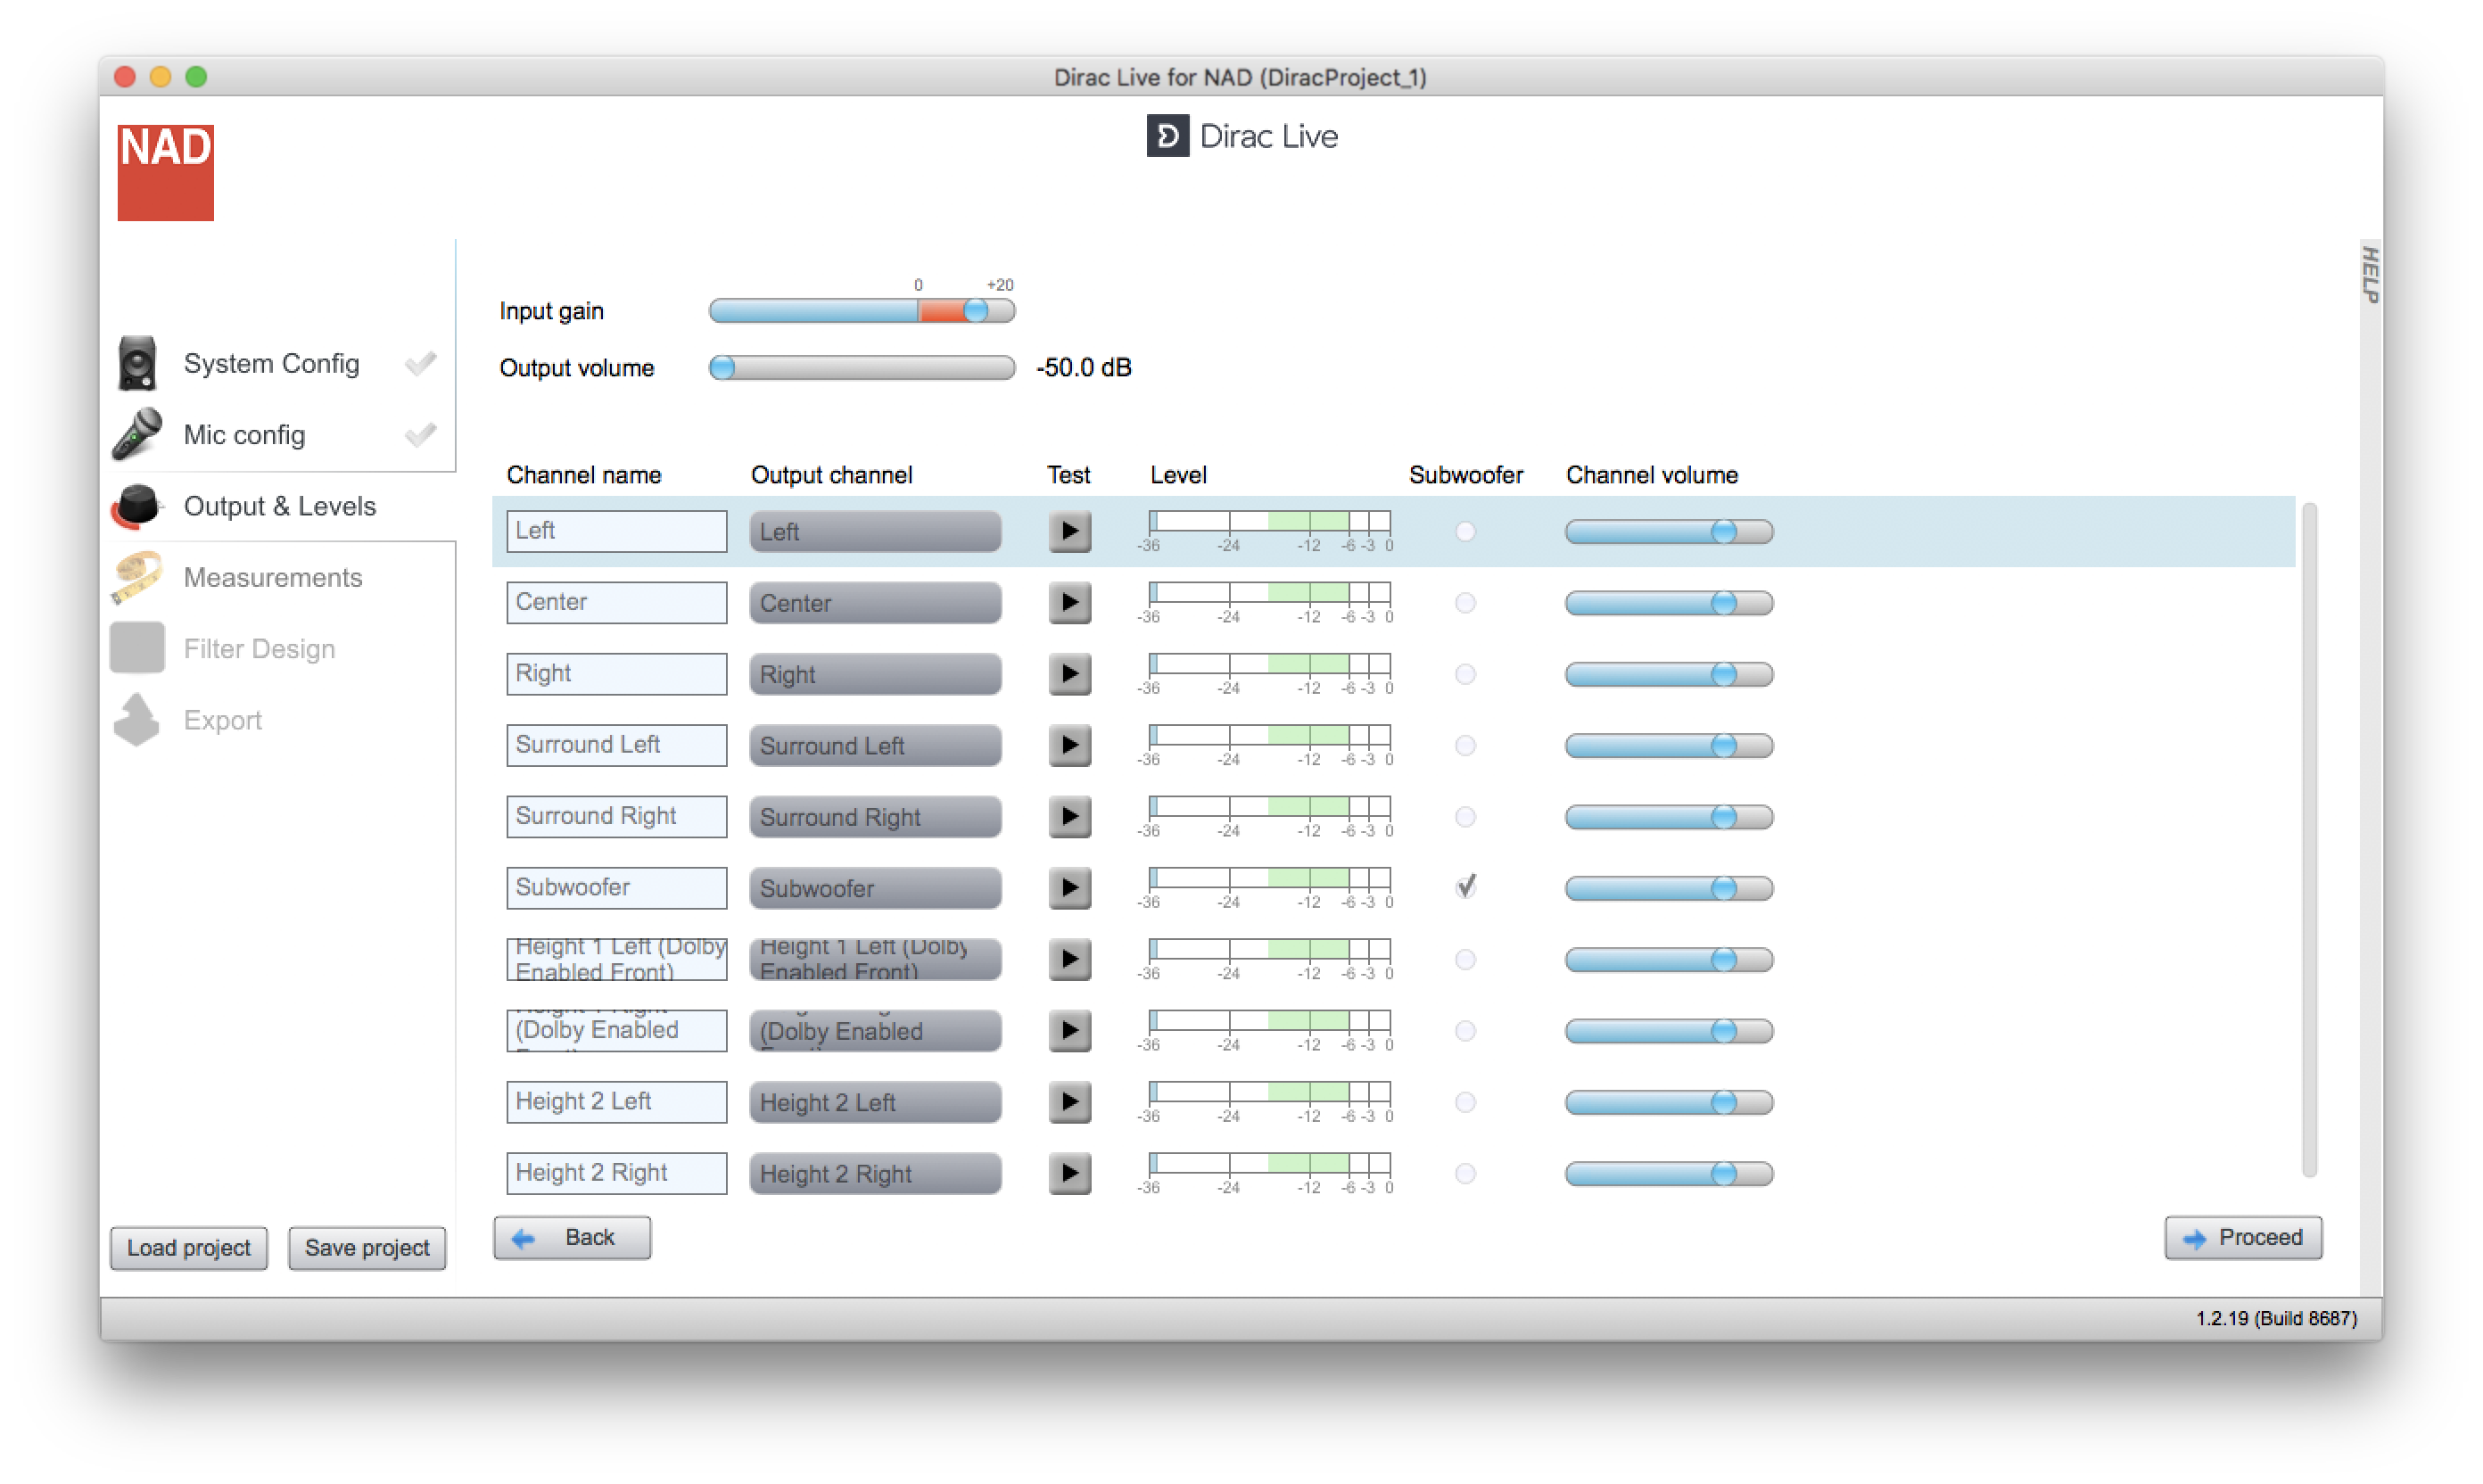
Play test tone (click "Test") on the satellite speaker that is lowest in volume.
Increase "Output volume" until meter of that speaker peaks to -12dB.
Play test tones on other satellite speakers and adjust individual channel gain on external amps until each speaker also reads about -12dB. Do the same for the subwoofer (if your sub has a crossover or low pass filter, make sure it is switched off or set to the highest available value; if there's a phase switch or knob, switch it off or set it to zero). If there's no gain knob (input sensitivity) on your amps or if you are using the internal amps in your AVR then use the "Channel volume" slider in DLCT (penalty: increases system noise level).
Next steps
Now you're ready to take actual measurements in DLCT. Continue by selecting the "Measurements" tab. Follow the instructions provided in the "Help" section on the right side of the app window (click "HELP" to toggle visibility).
After successfully measuring 9 locations, setting an appropriate target curve, optimizing and uploading filters to your AVR/pre-pro, make sure to adjust the crossover to the subwoofer correctly. For further information see this guide.